The next lesson I’ll show you a possibility of designing the abstract background for Valentine's Day, made very stylish.
Begin by creating a file of 1024x768 px and 72 dpi.
Select the Rectangle Tool (U) on the tools’ panel to represent a rectangle.

Next choose Blending Options and here Gradient Overlay selection:
Set the gradient’s parameters:

And this is what we get at this moment:

Next we’ll select the Custom Shape Tool (U) and out of the presented table we’ll choose the element shown below:

Select also white color, stretching out the figure the way demonstrated next image:
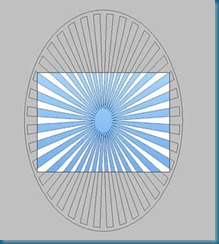
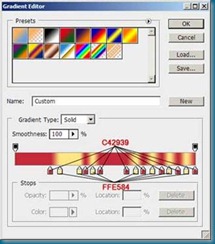
Fill 0% on the layer and select again Blending Options with Gradient Overlay.

Set the colors by following the codes demonstrated below:

Working with the background is finished. It’s time to start representing the picture’s main elements. In this case we’ll take again Custom Shape Tool (U) and here we’ll select the small heart, the same one from below:

We need to represent the heart in a way for the rays to come out the central part of it.

Gradient Overlay:
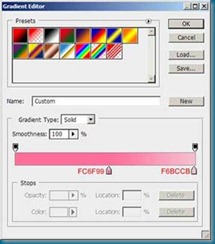

Set Blending Options/Stroke with the same parameters presented below:


Next we shall draw another heart inside the first one that we have already represented.

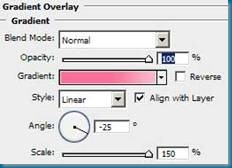
Select Gradient Overlay for it with the same parameters, but this time we need to fix the Scale option on 150.


Draw another heart, bu smaller one and place it the same way as the next picture indicates it:

Blending Options\Gradient Overlay:
Set the colors exatly the next codes indicate it.


We need to apply Stroke option for the last heart too.
It’s the picture we need to get on this stage:
Now we’ll try drawing one more heart, but a little bigger that the previous one and situate it the same way shown below.

Gradient Overlay
Set the colors, following the next codes:

Stroke:


Now we have to select another type of heart figure, using again the Custom Shape Tool (U) and its possibilities.

We shall draw four heart’s elements, placing them as below:

We shal number them out just not to mix the parameters that are characteristic for one or another. Here we have Blending Options for the first heart. Gradient Overlay:


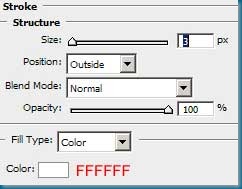
Stroke:

The parameters for the second heart: Gradient Overlay:

Stroke:


The parameters for the third heard: Gradient Overlay:

Stroke:

Stroke:

Finally the parameters for the last fourth heart. Gradient Overlay:


Next we shall draw more heart’s elements and give them the same colors with those presented next picture:

It’s time to choose the Pen Tool (P) and represent a kind of train under the hearts.

We’ll represent the train behind the third heart too.
We need repeating the same operation, but this time with the fourth heart.

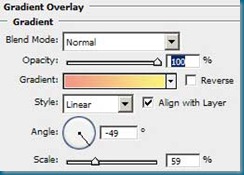
The Gradient Overlay option from bellow needs to be applied for the second heart’s train:
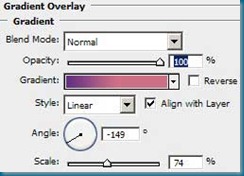

Next Gradient Overlay option will be applied for the train belonging to the third heart:
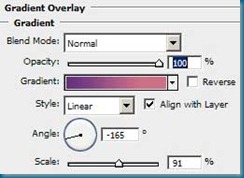

Finally we have to apply the next shown parameters for the train that is situated behind the fourth heart.


Next stage includes drawing one more heart that should be placed behind the main big heart, drawn at the beginning.
Fill 0% on the layer and apply Stroke option with the parameters demonstrated next table:

Make several copies of the last made heart, getting the same result as that one, presented below:

Now we shall use again the Custom Shape Tool (U) with its table that gives us the possibility to select the needed element.

The new figure is colored with #7D9DE5 and situated the position from below:

Apply for the new element Stroke option again:


At this moment we need to draw several more elements like the last one and position them out the same way as below:
Try to represent one more figure like this one, giving its layer this option Fill – 0%.

Select Stroke option with the same parameters from below:


We shall take now the Ellipse Tool (U) and represent a rounded element.

Gradient Overlay:

Valentine's day hearts - part 7

Make a copy of our last made circle, minimize it with Free Transform selection and place it the way shown next image:

Make one more copy of the same element:

Select Gradient’s parameters and change the shown colors with those indicated in the next picture:


Try to draw two more rounded elements with the colors’ codes from next picture:

The last stage includes downloading out of Internet a set of brushes, named Floral for picturing the next ornament. The brush containing the butterfly’s figure is numbered 1068.
The brush having the heart’s figure has the number 1276.
The final picture is the next one!

The abstract background for Valentine's Day is finished, so the lesson is! Good luck with your inpiration!


0 comments:
Post a Comment